Some time ago I published a post that describes the new rules a certificate has to follow to be accepted by Apple’s current devices (iPhone, iPad, MacOS PCs). Besides some rules about algorithms and bit length, that are usually met by all certificate authorities, there are some requirements, you will probably not see at first view. A certificate generated later than July 1st 2019 must not be longer valid than 825 days and the certificate must contain the value “Server Authentication” (OID 1.3.6.1.5.5.7.3.1) as Extended Key Usage (EKU).
The challenge
In my last post I mentioned that the IP Office certificate authority is able to create certificates that work with iPhones and other Apple devices. That was only half the truth, because only IP Office servers (Server Edition or Application Server) on at least release 11.0.4.1 create valid certificates.
Another thing is, that the way to establish a certificate authority (CA) as trustworthy on Apple devices, became less intuitive than before.
The solution
There are two main issues with the IPO CA up to 11.0.4.0.
- The default lifetime of an IPO generated certificate is 2555 days (7 years).
- The needed EKU value “ServerAuthentification” is missing.
The first one is just something you have to know, to adjust the lifetime within the certificate generation web form. Nevertheless it would be nice to see a working default value in the form.
The second one is a more special part, because the form doesn’t offer an option to set the EKU value.
You have to know that the certificate generation web form doesn’t do more than running a script with the parameters you entered. That script just collects the given values, creates a temporary OpenSSL config file and creates the certificate. And that’s where we can do some necessary adjustments.
Certificate values
Open /opt/Avaya/scripts/gen_certs.sh with nano:
nano /opt/Avaya/scripts/gen_certs.shSearch for the first occurrence of ‘DEFAULT_SERVER’ by pressing Ctrl+W and entering the search string followed by Enter.
You should see the line showing that the default lifetime is calculated as seven years:
DEFAULT_SERVER_CERT_VALIDITY=$((365*7)) # 7 yearsAdjust that line to have default validity of 820 days:
DEFAULT_SERVER_CERT_VALIDITY=$((820)) # 820 daysNow search for the occurrence of ‘if $EXTENDED_CSR’ with Ctrl+W. There you will see how the certificate config is created. Under the last ‘echo’ line of
        echo "[ v3_req ]"                                     >> $EXT_FILE
        echo "basicConstraints = $CA"                         >> $EXT_FILE
        echo "keyUsage = $KEY_USAGE"                          >> $EXT_FILE
        echo "subjectAltName = $SUBJECT_ALT_NAME"             >> $EXT_FILE
        echo "subjectKeyIdentifier   = hash"                  >> $EXT_FILE
    else
Add a new line so that it looks like this:
        echo "[ v3_req ]"                                     >> $EXT_FILE
        echo "basicConstraints = $CA"                         >> $EXT_FILE
        echo "keyUsage = $KEY_USAGE"                          >> $EXT_FILE
        echo "subjectAltName = $SUBJECT_ALT_NAME"             >> $EXT_FILE
        echo "subjectKeyIdentifier   = hash"                  >> $EXT_FILE
        echo "extendedKeyUsage   = serverAuth,clientAuth"     >> $EXT_FILE
    else
That’s all. Save the file with Ctrl+X followed by Y to confirm overwriting.
Now step into the settings webpage and open the certificate generation form.
You will see that the default lifetime now is 820 days.
A newly created certificate now has a valid lifetime AND the EKU is set as needed by Apple devices.
Trust root certificate with iPhone
Now that you have a valid certificates for the IP Office services, you have to ensure that it is trusted by your iPhone. That’s done by defining the issuing certificate authority as trustworthy.
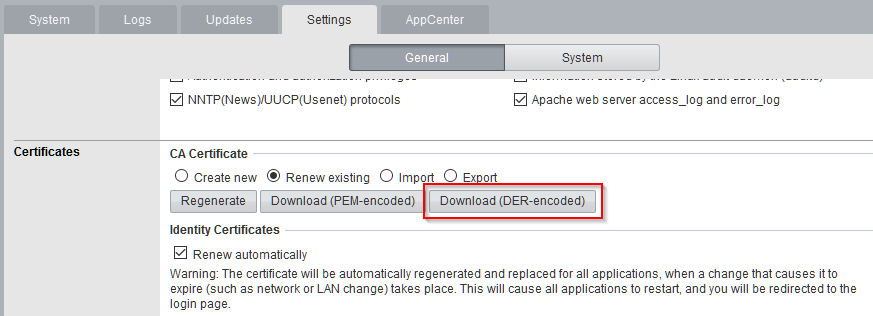
Go to the certificate generation web form and find the button to download the root certificate.

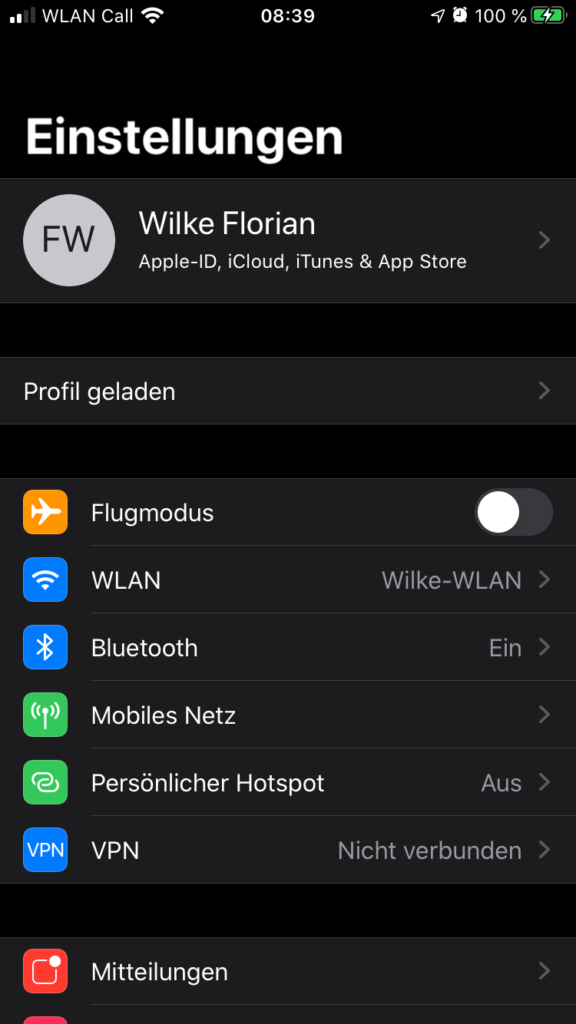
You can now send the certificate to the phone and open the file. You will get an info the the certificate is loaded and that you have to check the “profile” in the settings app. As soon as you open settings, you can tap on “Profile loaded”

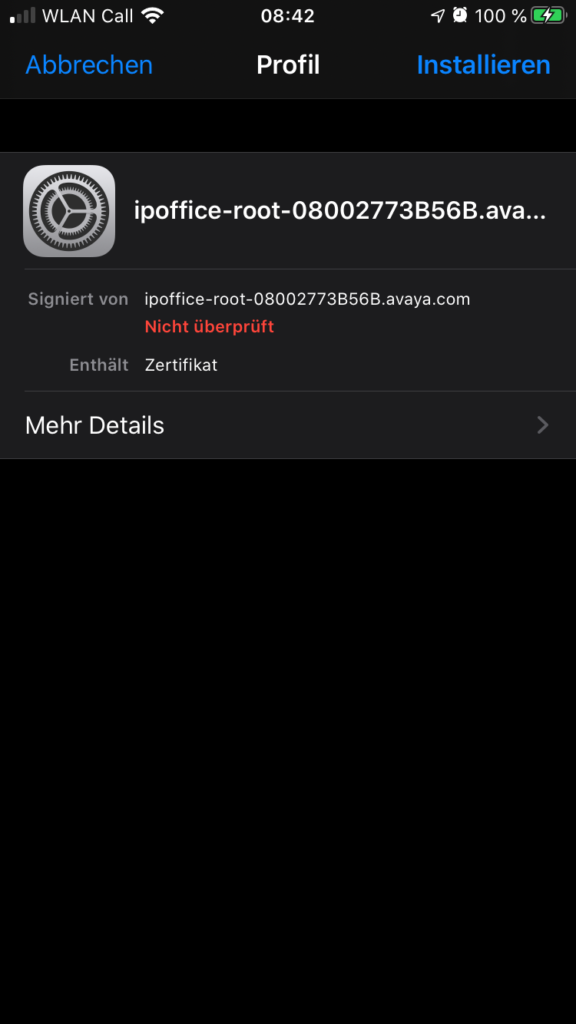
and you will see that the certificate is still not validated and you can tap on “Install”

When the installation is done you will see the new certificate authority as installed profile. While this was enough up to iOS 12, you now have to do another step.
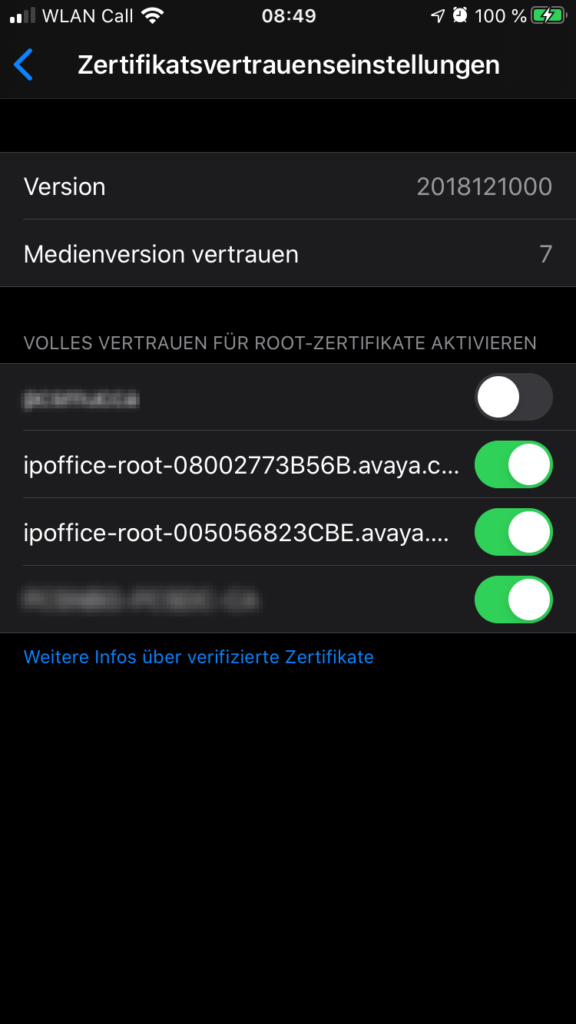
Go back to “Settings” and tap on “General” and the “About”. Now swipe down to the bottom of this area where you will find “Certificate trust settings”. Here you can set the new certificate authority as trusted

Now – and not earlier – your iPhone trust the IP Office certificate authority and any valid certificates this CA creates.
Conclusion
Certificates are created using OpenSSL, that has the needed abilities.
A certificate is created through a human readable script that is easy to adjust.
Adjusting the script brings the ability to older IPO servers to generate the needed certificates and you will hopefully be available to connect the customer’s Apple devices to IP Office.
Please be aware that any other upgrade than up to 11.0.4.1 (or later) will potentially overwrite the adjusted script and you have to replace the script again.
If you need further help with certificates, just contact me.
If you need further help with IP Office you can contact me through my main website: https://www.fwilke.com/home
Do you want to get information about new posts? Subscribe to my Newsletter
Thanks for the post. That’s a great help. How can I create certificate for Android phones and the other question is how can I install certificate on Android phones.
Thanks
Hi Adam,
good that it helps you. The post describes how to create the certificate for the server (IP Office in our case). The mentioned rules ‘only’ describe what requirements must be met until current Apple devices will trust them.
The other part is that the smartphone must know the issuing CA as trusted. Therefore you have to import the CA certificate on the phone. I found another post how to do this on android: https://support.securly.com/hc/en-us/articles/212869927-How-to-install-Securly-SSL-certificate-on-Android-device-
Best regards, Florian
How do I generate a certificate on the IP500 V2 (release 11.0.4.2) for IOS 13? It’s says to regenerate the certificate, which certificate?
IP Office: Equinox no longer works after upgrading iPhone to iOS13, VOIP certificate error seen
Rate Content Rate this Page
Doc ID: SOLN344601
Version: 27.0
Status: Published
Published date: 15 Oct 2019
Updated: 24 Mar 2020
Note 3: IP500V2 systems will need to be updated to 11.0.4.1 or higher, then the certificate regenerated so that the certificate meets iOS13 requirements. The above procedure is not applicable for 500v2 control units. 11.0.4.1 or higher on the IP500V2 generates a certificate with the correct expiry date.
Hi Oscar,
It can be done within security settings. There you can create a new self signed certificate with the needed alternative names.
Good luck, Florian
Thank you, Florian for your quick response. How do I create a new certificate if I’m not using server edition? I looked under security and certificates in the Manager and didn’t see anywhere were I could create one. Under the web manager it shows I could regenerate, but not sure which certificate to regenerate.
Hi, also what do you mean by “alternative names”. I’m not sure about what you mean.
The needed information about alternative names can be found here: https://ipofficekb.avaya.com/businesspartner/ipoffice/mergedProjects/manuals/install/sip_extensions_en.pdf?rnd=5111
In security settings – System – Certificates you can find a button called ‘Regenerate’. If you click that button you will see a window, where you can enter the SANs you need. SIP FQDN, SIP Domain, SIP URI.
Thank you. Is certificates needed if I’m not using TLS? I regenirated and enter the following:
Signature: SHA256/RSA2048
Default Subject Name: avaya.domain.com
Subject Alternative Name(s): DNS:avaya.domian.com, DNS:avaya.domian.com, IP:96.34.xxx.xxx
Does this look correct?
This depends on the IPO config. TLS is highly recommended. You will also have to apply the certificate to your smartphone. I always use TLS, so I am not sure if it will work totally unencrypted.